
Controlling the visibility of different Assets within a Scene can add significant depth to your interactive Ads. This article will guide you through using the Timeline panel, a robust tool that enables you to manage when various Assets make their appearance and exit within a Scene.
It’s necessary to define a Scene duration and open the Timeline panel before adjusting Layers on the Timeline.
You can either manually set the Scene duration or use a Link Layer (an advanced feature that allows the duration to be automatically set based on a specific Layer's length). Following this, you need to bring up the Timeline panel. You can do this by clicking on the 'Expand Timeline' icon situated at the bottom-right corner of the editor.
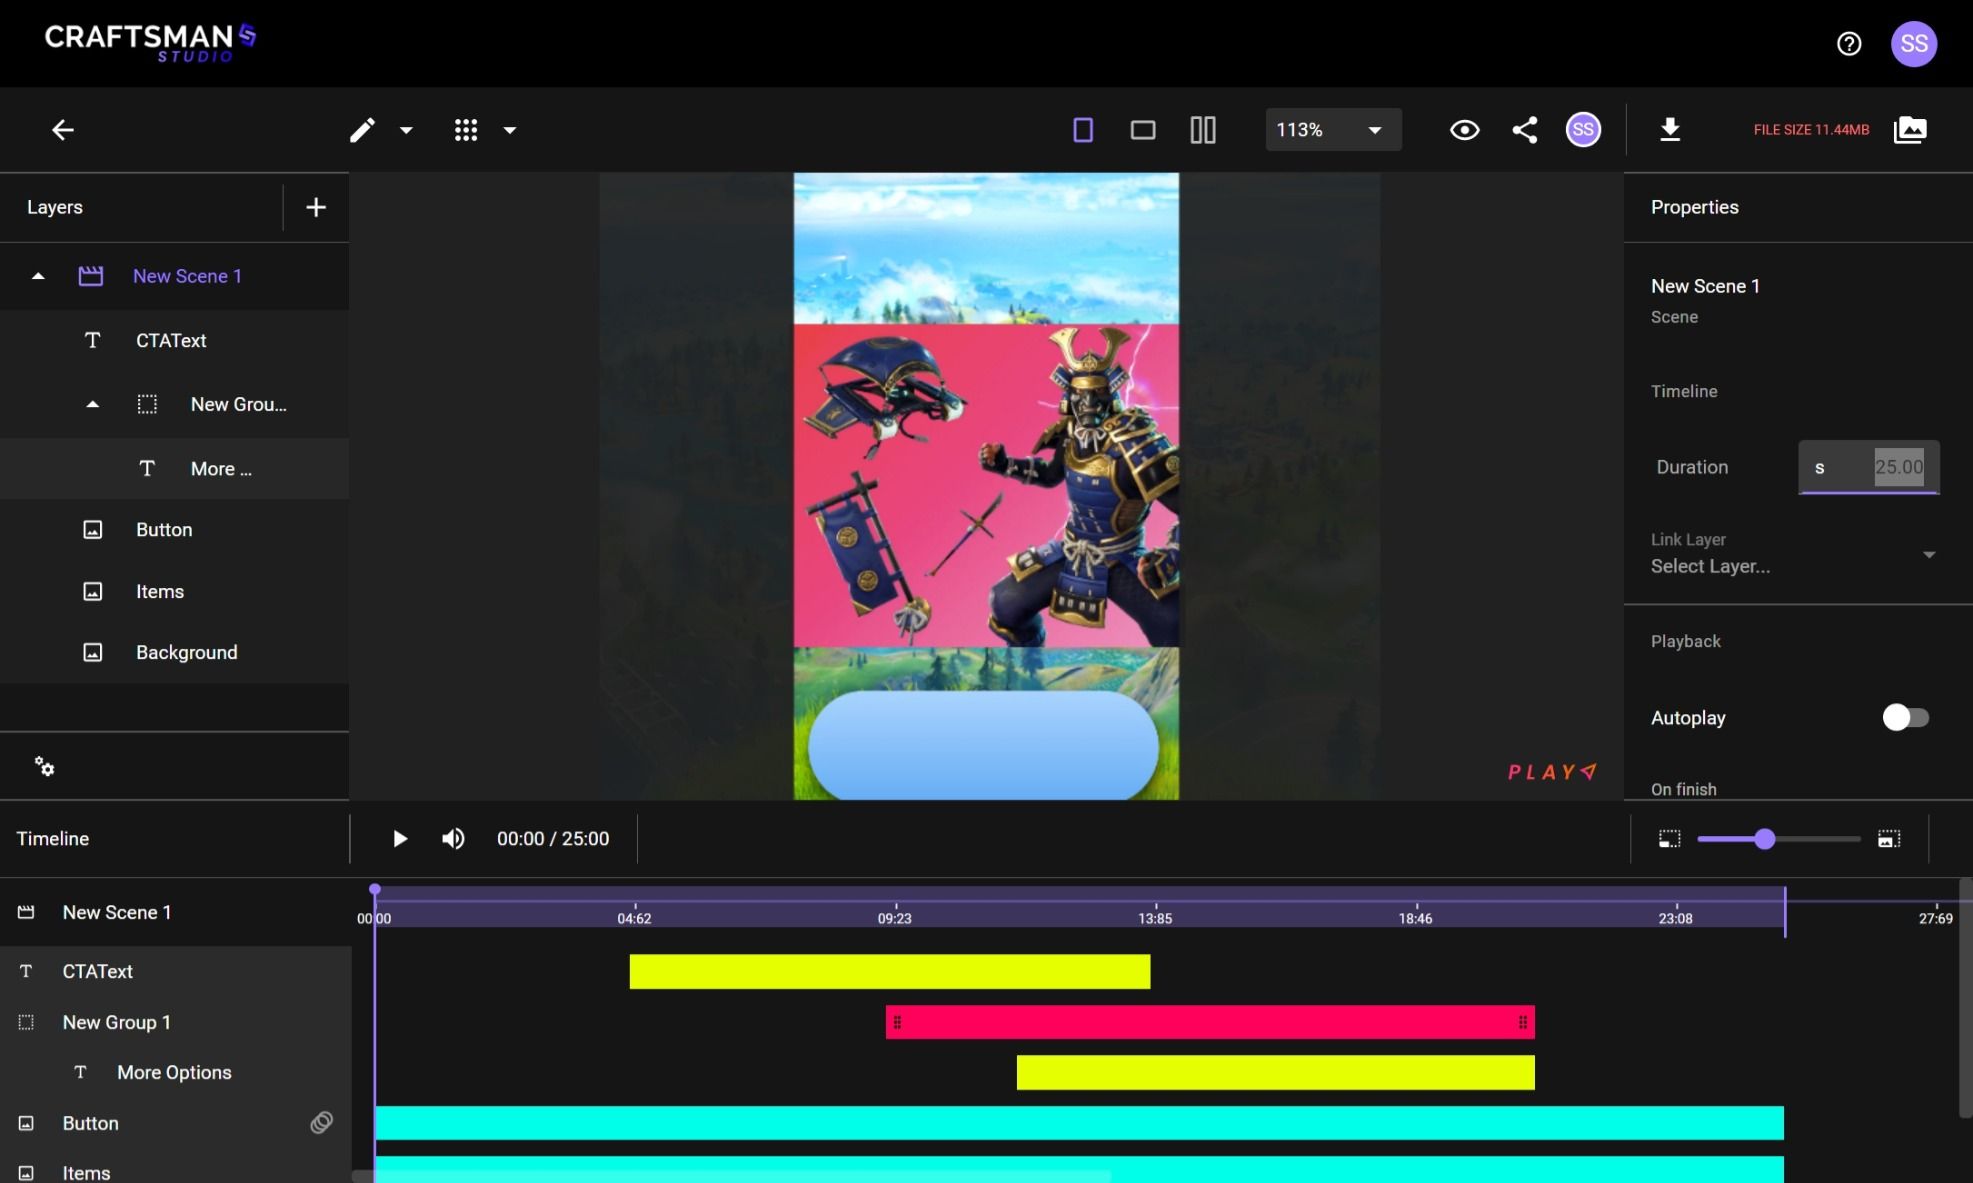
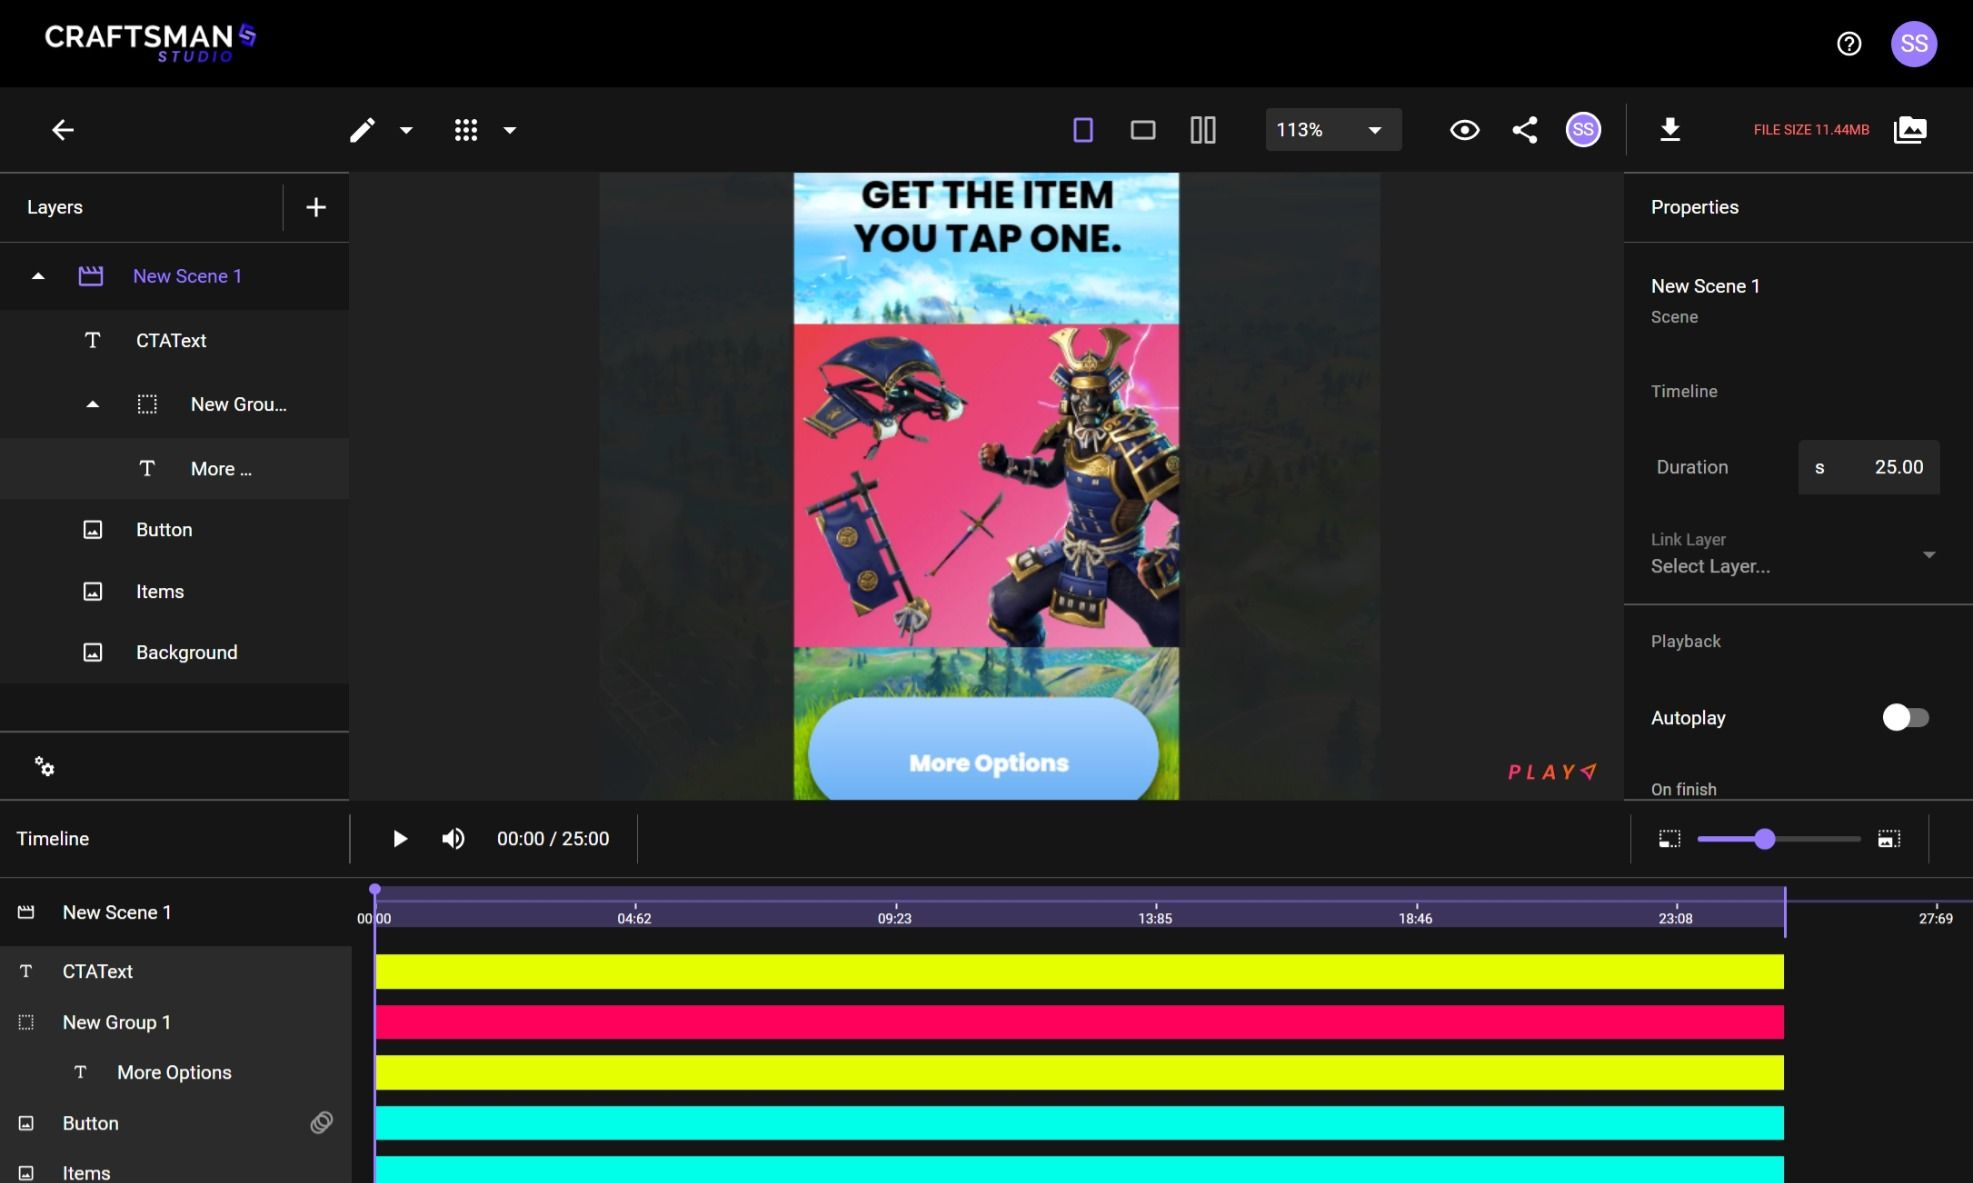
Upon expanding the Timeline panel, you will notice a row and band for each Layer in your Scene. A Layer here refers to an individual Asset or Group of Assets in the Scene. By default, these bands span the entire duration of the Scene.
The bands have grab areas at their ends, which allow you to modify the start or end time of a Layer's presence on the Scene. You can move the entire Layer along the Timeline if its duration is less than the total Scene duration, allowing for even more customization.
Let's illustrate this with a practical example. Imagine you have a Scene with a total duration of 15 seconds. If you drag the Layer's start time to the 5-second mark and end time to the 10-second mark, you effectively set the Layer's duration to 5 seconds. Consequently, this particular Layer will only be visible between the 5th and 10th second, adding a dynamic element to your Scene.
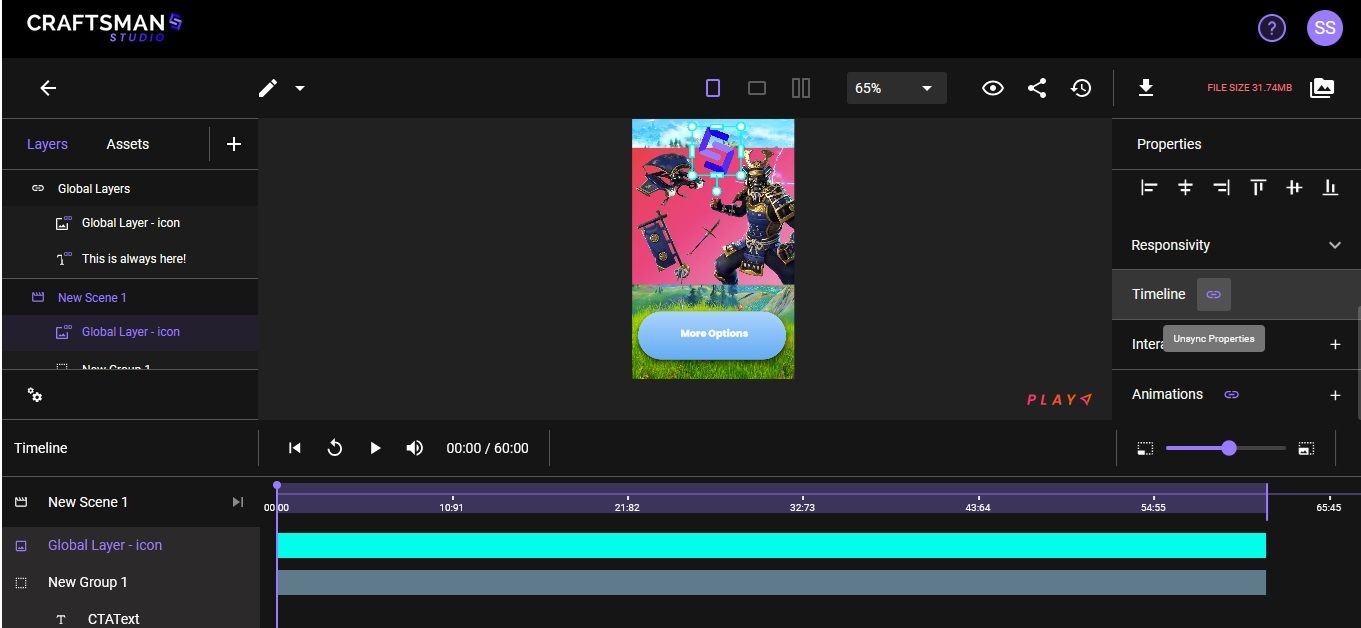
You can sync your Timeline settings with Global layers for consistent timings across all scenes. As you know that Global Layers maintains consistency & cohesion across multiple scenes. You will find the ‘Timeline’ controls in the 'Timeline' section of the properties panel. To manage your project's timeline, click on the ‘sync’ icon next to ‘Timeline’ to synchronise ‘Duration’, ‘Start Time’, and ‘End Time’, universally across global layers.

To preview the Scene, just click on the Play button located at the top of the Timeline panel. This way, you can ensure everything works according to your plan, making your ad or presentation look exactly how you envisioned it.
In summary, this guide has walked you through the essentials of managing Layer visibility within a Scene in Craftsman Play using the Timeline panel. We've covered how to set up your Scene, delved into the workings of the Timeline panel, and explained the process of manipulating Layer durations for dynamic presentations.We also covered how to sync the Timeline setting for Global layers to maintain consistent timings across all scenes.
By adjusting start and end times, and even moving Layers along the timeline, you gain unparalleled control over the visibility of your Assets. We also illustrated this concept with a practical example to aid your understanding. Finally, we touched upon the importance of previewing your project to ensure it aligns with your vision.
With these tools at your disposal, you're ready to bring depth and complexity to your Scenes in Craftsman Play, creating complex compositions that grab viewer’s attention!
Create, automate, innovate, and turn your creative needs into successful marketing with Craftsman Studio


